In this article, let’s look at how we can use PowerShell to manage your Office 365 environment. before moving forward, you need to first download & install Office 365 cmdlets.
Download Links
- Microsoft Online Services Module for Windows PowerShell (32-bit version)
- Microsoft Online Services Module for Windows PowerShell (64-bit version)
After installing Online Services Module, we can run Online Services Module from the start menu –> Programs –> Microsoft Online Services
Once you open PowerShell Online Services module it will import Online Services modules in to PowerShell
As the first step, we need to get connected to our Office 365 account and for that we need to use “Connect-MsolService” cmdlet
soon after you will be prompted to enter your user credentials which you are using to Administrate Office 365 account
after entering your credentials, you will successfully get connected to your Office 365 account. Now you can administrate your Office 365 account using Powershell
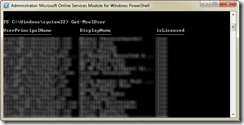
let’s try with “Get-MsolUser” cmdlet and see whether we can get a list of users whom I have created.
find below reference link to get information about more PowerShell cmdlets which are available for you to administrate your Office 365 Account.
http://onlinehelp.microsoft.com/en-us/office365-enterprises/hh125002.aspx


